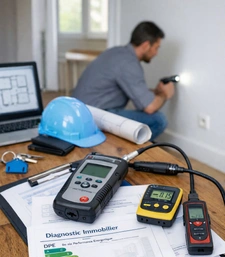


Selling a property begins with a decisive first impression: the one your photos will create. In 2026, the visual quality of your real estate listings directly determines your ability to attract buyers and close a sale quickly. The figures speak for themselves: listings featuring professional visuals generate up to 60% more clicks and reduce selling times by several weeks. In this article, Capifrance shares 5 practical tips to enhance the presentation of your property through effective and impactful real estate photography. To value your property, create an attractive listing with professional-quality photos, and sell your house, apartment, land, estate, commercial premises, or business assets, contact your local Capifrance real estate advisor.
Why Great Photos Are Essential to Selling a Property
Selling a property in 2026 starts with a crucial visual first impression. Before even reading the description or checking the price, potential buyers judge your property based on its photos. Real estate portals also rank listings with high-quality visuals more favorably, resulting directly in more clicks and more viewings. This algorithmic prioritization benefits well-presented listings, creating a virtuous cycle for sellers who invest in professional photography.
The reality is clear: 1 in 4 buyers believes that real estate listing photos are of poor quality. This figure, revealed by Nodalview, highlights the scale of the problem in today's market. Even more striking, 95% of visitors to a property listing website spend twenty seconds looking at the first photo, and 60% of their total time on the listing is devoted to the visuals. If your photos fail to capture attention immediately, your property disappears among the many available listings.
The Impact of Professional Photography on Listing Visibility
Professional photography is no longer a luxury but a key factor in a successful property sale. The numbers are compelling: listings with high-quality visuals generate up to 139% more clicks than those featuring amateur photos. Even better, agencies that use professional photographers see their click-through rates multiplied by 2.8 and receive 2.1 times more inquiries per property.
The impact on selling time is equally impressive. High-quality photos can reduce the average time on the market by 21 days, and properties sell 32% faster. For homes priced between €400,000 and €500,000, professional photography can even increase the final selling price by several thousand euros.
Beyond clicks, visual quality directly influences the perceived value of a property. Professional photos inspire confidence among potential buyers, demonstrate the seller's professionalism, and make it easier for prospects to picture themselves living in the property. Conversely, poor visuals create a negative first impression that is difficult to overcome during an in-person viewing.
The Difference Between Amateur and Professional Photography
The difference between an amateur photo and a professional one is not only about the equipment used but also about technical expertise and the photographer's trained eye. Here are the main differences:
Amateur Photo vs. Professional Photo: Comparison Table
Criterion | Amateur Photo | Professional Photo |
|---|---|---|
Composition | Approximate framing, unflattering angles, distorted perspectives | Precise framing, straight vertical lines, optimized space presentation |
Lighting | Poor lighting, dark areas, frequent backlighting | Mastery of natural and artificial light, balanced HDR rendering |
Spatial Perception | Rooms appear cramped and smaller | Appropriate wide-angle lens used to enhance volumes |
Impact on Clicks | Low click-through rate, listing gets lost among competitors | +139% more clicks, better algorithmic visibility |
Average Selling Time | Longer time on the market | Average reduction of 21 days |
An amateur photo taken with a smartphone without preparation generally features poor framing, poorly lit rooms, and dull colors. Vertical lines are often distorted, creating an unbalanced impression. In contrast, a professional photo uses an appropriate wide-angle lens, controls lighting to avoid dark areas, and employs editing software such as Photoshop or Lightroom to accurately reflect the property's atmosphere.
This difference immediately translates into results. Properties photographed by a professional increase perceived value in buyers' minds and demonstrate the commitment of the real estate agent to the seller. At Capifrance, advisors offer professional photography that inspires confidence and encourages users to click on the listing details, maximizing your chances of selling quickly and at the best price.
Tip 1: Prepare and Stage Your Home Before the Photo Shoot
Before even pressing the shutter button, preparing the property is a crucial step in creating images that appeal to buyers. Home staging is based on a simple principle: creating a neutral and welcoming environment that allows prospective buyers to imagine themselves living there. This enhancement involves decluttering, depersonalizing, and paying attention to visual details.
Declutter and Depersonalize Every Room
Decluttering is the first step. Remove unnecessary items, put away personal decorations, and clear surfaces such as countertops, shelves, and dressers. The goal is to create a sense of space and generous proportions. Family photos, personal collections, and overly distinctive decorations should be temporarily removed to create a neutral atmosphere.
Also, make beds neatly, open curtains to maximize natural light, and add a few subtle decorative touches such as matching cushions, green plants, or elegant tableware. These details add warmth without overcrowding the space. If your property requires more extensive reorganization, Capifrance's virtual home staging service provides an effective solution to digitally optimize the layout and showcase the property's potential without investing in physical furniture.
Enhance Outdoor Spaces and Surroundings
The exterior of your home creates the first impression for both visitors and online buyers. A well-maintained garden, clean terrace, and tidy outdoor furniture increase the property's overall appeal. Mow the lawn, trim hedges, clean pathways, and store gardening tools. Even a small garden or courtyard can become a significant asset when properly showcased.
For properties with terraces or balconies, arrange a few potted plants and ensure the furniture is clean and well-organized. Outdoor areas should be photographed like additional living spaces, as they increase perceived value and effectively expand the property's living area in the eyes of buyers.
Choose the Right Time for Your Photo Session
Natural light plays a central role in the quality of real estate photography. For bright and inviting images, schedule your shoot during the golden hours: early morning or late afternoon. At these times, the light is soft and diffused, highlighting spaces without creating harsh shadows.
Avoid shooting in direct midday sunlight, which creates strong contrasts and difficult-to-manage dark areas. Similarly, overcast days can make a property look dull and less attractive. Plan your session on a sunny day, open all windows, and switch on interior lights to complement natural lighting and create a welcoming atmosphere.
Tip 2: Master Composition and Lighting Techniques
Successful real estate photography goes beyond preparation. Shooting technique plays a crucial role in highlighting space, capturing the property's atmosphere, and transforming a simple image into a visual that attracts buyers. In 2026, the most effective listings combine expertly managed natural light, advanced techniques such as HDR, and thoughtful composition.
Use Natural Light and Avoid Dark Areas
Natural light remains your best ally for warm and authentic photos. It creates an inviting atmosphere and highlights textures, volumes, and the true colors of each room. Before taking photos, open all shutters and curtains to maximize incoming light. Turn on interior lights as well to balance darker areas, particularly in corners and hallways.
Avoid backlighting, which creates silhouettes and hides details. If photographing a room with a large bright window, position yourself so the light comes from the side or front, never from behind. This simple adjustment prevents halos and overexposed areas that can disappoint online viewers.
To maximize impact, schedule your shoot during times when the light is soft and diffused: early morning or late afternoon. These periods provide flattering natural illumination that enhances spaces without creating harsh shadows.
Use HDR for Balanced Results
HDR (High Dynamic Range) is a technique that combines multiple exposures of the same scene to capture details in both dark and bright areas simultaneously. In practice, you take three to five photos at different exposure levels and merge them using software to create a balanced final image that closely resembles what the human eye sees.
This technique is particularly useful in real estate photography when shooting rooms with large windows or significant contrasts between interior and exterior spaces. HDR preserves details in the garden visible through the windows while also revealing furniture and interior textures. The final result is harmonious, without blocked shadows or overexposed highlights.
To get started, activate the bracketing or automatic HDR mode on your camera or smartphone. Use a tripod to stabilize your equipment and avoid alignment issues between exposures. With practice, you'll produce professional-quality images that showcase every detail of your property.
Keep Vertical Lines Straight and Refine Composition
Thoughtful composition is what separates amateur photography from professional visuals. One essential rule in real estate photography is to keep the camera perfectly level so that vertical lines—walls, door frames, and windows—remain straight and undistorted. A tripod equipped with a spirit level can help maintain proper alignment.
For composition, photograph rooms from the corners rather than from the center. This viewpoint provides a broader perspective, highlights the room's dimensions, and creates a greater sense of depth. Include portions of both the floor and ceiling to accurately convey volume and help buyers visualize the space.
Outdoors, choose angles that show two sides of the property whenever possible, revealing both architecture and surroundings. Photograph façades in sunlight and avoid gloomy weather that dulls colors and reduces visual appeal. A blue or lightly clouded sky adds life and enhances the attractiveness of your listing.
Tip 3: Choose the Best Camera or Smartphone for Your Photos
Mirrorless Camera, DSLR, or High-End Smartphone: Which Should You Choose?
Are you hesitating between using a camera and your smartphone to photograph your property? The answer depends on your budget and objectives. For occasional use, a recent high-end smartphone equipped with HDR mode can deliver respectable results, provided you stabilize it with a tripod and make the most of natural light. However, image quality and adjustment options remain more limited.
A mirrorless camera represents the best compromise, combining portability, versatility, and image quality comparable to a DSLR. Equipped with a full-frame or APS-C sensor and a wide-angle lens, it captures entire rooms while remaining easy to handle. In 2026, mirrorless cameras often include 4K video capabilities and advanced HDR modes, ideal for enhancing your listing with diverse visual content.
Whether you choose a camera or a smartphone, mastering basic settings and using appropriate accessories remain essential for producing professional-looking images.
Essential Accessories: Tripod, Wide-Angle Lens, and Key Settings
Beyond the camera itself, a few accessories make all the difference. A tripod is essential for stabilizing your equipment, preventing blur, and enabling longer exposures in darker rooms. Combined with a remote shutter release or self-timer, it guarantees sharp images.
A wide-angle lens (between 10 and 24 mm) visually enlarges spaces and highlights room dimensions, making it particularly valuable for smaller properties. However, be mindful of distortion: an improperly used wide-angle lens can curve walls and distort perspectives. Choose a quality lens and compose carefully to maintain a natural appearance.
As for settings, three parameters are particularly important. Keep ISO between 100 and 400 to minimize noise and ensure sharpness. Use an aperture between f/8 and f/11 to achieve sufficient depth of field so the entire room remains in focus. Adjust shutter speed according to available light, using longer exposures on a tripod when necessary. Finally, set the white balance according to the lighting conditions (daylight, LED lighting, fluorescent lighting) to reproduce colors accurately.
Essential Equipment and Settings Checklist
- Mirrorless camera or high-end smartphone
- Stable tripod
- Wide-angle lens (10–24 mm)
- ISO: 100–400
- Aperture: f/8 to f/11
- Shutter speed adapted to lighting conditions
- White balance adjusted to ambient lighting
- Remote shutter release or self-timer
Tip 4: Use Drones and Virtual Tours to Stand Out
Enhance Your Property with Drone Photography
Drone photography is a powerful tool for showcasing certain types of real estate. It is particularly effective for large properties, homes with extensive grounds, properties with exceptional views, or homes located in attractive environments such as near parks, lakes, or lively city centers. Aerial photography provides a comprehensive perspective of the property and its surroundings that ground-level images simply cannot capture.
In France, commercial drone use is strictly regulated. Since January 2026, European and French regulations require operators to register on the AlphaTango platform, comply with authorized airspace restrictions, and fly only during daylight hours within the open category. For real estate projects, it is therefore advisable to work with a certified professional drone pilot who understands the required authorizations and holds appropriate liability insurance.
Capifrance offers drone photography services as part of its property enhancement solutions, including aerial photos and videos designed to showcase your listing. These panoramic views increase the property's appeal and help buyers better visualize their future environment.
Offer an Immersive Virtual Tour to Convince Buyers and Agencies
In 2026, 360° virtual tours have become a standard feature for standing out on real estate portals. They allow buyers to explore a property remotely as if they were physically there, moving freely from room to room. This immersive experience improves understanding of layouts, dimensions, and natural light while saving considerable time for everyone involved. Buyers can perform a more effective pre-selection process, resulting in better-qualified physical visits and faster negotiations.
Capifrance integrates immersive tours and 360° videos into its property enhancement services, strengthening your listing's brand image and attracting more potential buyers. These digital tools perfectly complement professional photography and drone footage.
The Capifrance network goes even further by offering the "TRY IT" service, a unique innovation that allows buyers to test the property for several hours. This extended experience provides a deeper sense of immersion and reassures buyers before making their final decision. By combining drone photography, virtual tours, and the TRY IT service, you maximize your chances of selling quickly and at the best price.
Tip 5: Hire a Professional Photographer or Learn the Skills Yourself
How Much Does a Real Estate Photographer Cost in 2026?
Hiring a real estate photographer is an investment, but it is also a decisive factor in selling faster and often at a better price. In 2026, pricing varies depending on the service provided and the property's location. For a standard photo shoot including 15 to 25 edited HDR images, expect to pay between €150 and €400. If you wish to showcase a property with extensive land or outstanding views, a package including drone photography typically ranges from €300 to €600. For luxury properties, premium photo shoots start at around €500 and may include virtual home staging, advanced post-production, and a 360° virtual tour.
The return on investment is measurable. A professional photo shoot can generate up to 60% more clicks on real estate portals and significantly reduce selling times. Before choosing a photographer, review their online portfolio to assess the consistency of their style and the quality of their work. Also check client reviews and request examples of post-production work to ensure the results align with your expectations. Several freelance marketplaces such as Utopix, Shoootin, and Codeur.com make it easy to find photographers specializing in real estate, offering transparent pricing and real-time availability.
The typical real estate photography workflow includes four key stages: property preparation (decluttering, cleaning, lighting optimization), on-site shooting (between one and three hours depending on the property's size), post-production (HDR editing, color correction, perspective adjustment), and delivery of high-resolution files within 24 to 72 hours. This efficiency allows listings to be published quickly and benefit from favorable market conditions.
Learning Real Estate Photography: Platforms and Training Options
For real estate agents and independent consultants seeking greater autonomy and control over property marketing, learning real estate photography is a strategic option. In 2026, numerous online courses and in-person workshops are available, some of which are eligible for CPF funding. Organizations such as JC Pieri Formation, Photo Up, and CMA Formation Nouvelle-Aquitaine offer comprehensive programs covering technical fundamentals (camera settings, HDR, composition), real estate specialization (space composition, natural light management, Lightroom editing), and even commercial aspects (pricing, delivery, client relations).
Most programs last between two and six days and combine theory with practical fieldwork. Participants learn how to produce attractive real estate photos, perform advanced HDR editing, and streamline their workflow for faster delivery.
Beyond certified courses, numerous free and paid resources are available online, including video tutorials, specialized webinars, and communities of real estate photographers on social media. Platforms such as Nodalview also offer turnkey solutions combining a mobile application, integrated training, and automatic editing tools, enabling agents to create professional-quality visuals themselves for a fixed monthly cost. This independence provides maximum responsiveness and consistent quality—two essential advantages in a competitive market.
Capifrance Helps You Enhance and Sell Your Property
Selling a property in 2026 requires much more than simply publishing an online listing. With nearly 3,000 independent real estate advisors across mainland France and overseas territories, Capifrance provides local expertise and a complete ecosystem of services designed to maximize your property's appeal and accelerate its sale.
Each Capifrance advisor has in-depth knowledge of their local market and supports you at every stage of your project, from free property valuation to the final signing before the notary. This local presence ensures accurate property positioning and a sales strategy tailored to the realities of your area.
To enhance your listing, Capifrance offers professional marketing services that make a real difference: photos taken by qualified real estate photographers, immersive 360° virtual tours allowing buyers to discover your property remotely, drone photography to highlight large estates and their surroundings, and virtual home staging to optimize layouts without renovation work. These tools are key to creating an emotional connection with potential buyers.
With the Mandat+ package, you benefit from comprehensive support and maximum exposure to sell more quickly. This exclusive 15-month agreement guarantees the full commitment of your advisor and access to all Capifrance network advantages.
The first step is always property valuation. Contacting a Capifrance advisor allows you to obtain an accurate valuation based on local market data and on-the-ground expertise. From listing your property to final negotiations, your advisor personally guides you through every step to achieve the best possible outcome.
Conclusion
In 2026, the visual quality of your real estate listings remains a decisive factor in selling faster and at the best price. Here are the 5 essential tips to remember:
- Prepare your home: declutter, depersonalize, and perfect every detail before the photo shoot.
- Master lighting and composition: use natural light effectively and apply HDR techniques for balanced results.
- Choose the right equipment: opt for a mirrorless camera with a wide-angle lens or a high-end smartphone.
- Use drones and virtual tours: stand out with aerial photography and immersive 360° experiences.
- Hire a real estate photographer: invest in professional photography to maximize your listing's appeal.
Well-crafted photos transform the perception of your property and create more opportunities to sell. For personalized support and a free property valuation, contact a Capifrance real estate advisor today.
FAQ: Frequently Asked Questions About Real Estate Photography
How Can You Take Great Real Estate Photos with a Smartphone?
To achieve excellent results with a smartphone, use a recent high-end model equipped with a wide-angle lens and built-in HDR mode. Stabilize the device with a tripod to avoid blur and always shoot in natural light, ideally in the morning or late afternoon. Position yourself in room corners to maximize depth perception, frame windows carefully to balance contrast, and edit your photos using a dedicated application such as Nodalview. Be sure to declutter each space before shooting to create a professional and attractive result.
Is It Possible to Photograph a House Without Permission?
In France, property image rights are governed by specific rules. You may photograph the exterior of a house from public spaces without permission, provided it does not cause undue disturbance to the owner and the property is not protected by copyright as an architectural work. However, photographing the interior of a property always requires the owner's written consent, particularly for commercial purposes such as a real estate listing. Additional restrictions may apply to listed or protected heritage properties, especially when images are used commercially.
What Does a Real Estate Photographer Do?
A real estate photographer is a professional who enhances properties for sale or rent through impactful visual content. Their work includes scouting locations to identify the best angles, conducting carefully planned photo shoots using natural or supplementary lighting, and carrying out meticulous post-production to straighten lines, adjust contrast, and ensure attractive yet realistic results. They work closely with real estate agencies and private sellers, often under tight deadlines and varying weather conditions. This profession can be practiced either as a freelancer or as an employee within a real estate network.
How Much Should You Budget for a Luxury Real Estate Photo Shoot?
For a luxury real estate photo shoot, expect to pay from €500 to more than €1,000 depending on complexity and included services. This pricing generally covers a large number of photos (at least 20 to 30), drone photography to showcase the property's surroundings and location, virtual home staging to optimize layouts, advanced HDR editing, and professional image processing. Exceptional properties require refined staging, advanced technical expertise, and visual storytelling that justify this investment when targeting an international luxury clientele.
Author :

Frédéric Rémy – Director of Commercial Performance
A real estate professional for several years within the Capifrance network, I would like to share with you some essential advice to help you succeed in your real estate project with the support of our advisors.